Navigation
feedback
![]()
Return to: Home Page Canoeing Pages Routes and Photos Cedarstrip Project
Making Paddles (01/01/01)
First of all, this is how 'I' made canoe paddles, not necessarily the 'right' way to make them. So this is more 'the continuing adventures of Tom' than it is a 'how to' page.
I did not have previous woodworking experience so, before building a canoe, I thought I should familiarise myself with the materials and tools by making a laminated canoe paddle. Besides, my old Cherry paddle - which I have used for the last twenty years - was in need of repair. So before making any mistakes repairing my favourite old paddle, not to mention building a canoe, I thought I should try making a paddle from scratch.
Materials:
I used an old Maple headboard that was laying around in my Dad's workshop. The twin of this one:

I started by planing the thin laminate from the surface
of the headboard. As it turned out, the board was actually several
pieces of Maple laminated together. There were also quite a few tiny
nail holes
scattered throughout the board which left long stained streaks  in the
wood. The
nail holes indicate that this Maple had another life between being a tree
and a headboard. I gave it yet another life as
two paddles. The adjacent picture shows Paddle One glued but still in a rough state.
Beside it are extra strips cut from the headboard - which later became Paddle
Two.
in the
wood. The
nail holes indicate that this Maple had another life between being a tree
and a headboard. I gave it yet another life as
two paddles. The adjacent picture shows Paddle One glued but still in a rough state.
Beside it are extra strips cut from the headboard - which later became Paddle
Two.
I need a basic all purpose spare paddle so I chose a
simple rectangular design.  The grey colour is wood epoxy I got from a hardware
store. I don't like the gray lines it left so later I used clear epoxy (Industrial Formulations G2) mixed with sawdust as a
thickener. At this stage it looked more like a
pizza paddle than a canoeing paddle!
The grey colour is wood epoxy I got from a hardware
store. I don't like the gray lines it left so later I used clear epoxy (Industrial Formulations G2) mixed with sawdust as a
thickener. At this stage it looked more like a
pizza paddle than a canoeing paddle!
 The blade was too wide so I cut two end strips off each
side, as seen in the adjacent photo of the planed and shaped blade.
The blade was too wide so I cut two end strips off each
side, as seen in the adjacent photo of the planed and shaped blade.
One mistake was that the grain of the Cedar strips on each side of the blade faced the wrong way, making planing very tricky. After shaping and sanding the blade, I shaped the grip, and finally the shaft. The carving and shaping was done by hand and eye using a plane, spokeshave, wood carving chisels, and lots of sandpaper. Compare the two pictures of the grip below (sorry about the blur):


The shaft near the blade turned out too thin so I laminated a thin piece of maple over both sides of the Cedar running up through the length of the paddle. Finally(?) I coated everything with Tung Oil. Later, I sanded it down again and removed the thin piece of Maple from all but the section where the shaft was too thin because the rest of the shaft was too thick. Too thin! Too thick! It's a good thing this was the practice project! I left it unfinished and meant to fibreglass the blade when I reached the glassing stage of the canoe I am going to build.
 Paddle One didn't last very long. The
shaft snapped during stress testing in the workshop. Better there than on
the water!
Paddle One didn't last very long. The
shaft snapped during stress testing in the workshop. Better there than on
the water!
Paddle Two was made in the same way except that I did
not use  any Cedar. This paddle was meant to be my whitewater paddle
so I wanted it to be all hardwood. It is made of the best pieces of
Maple from the headboard (which I set aside before beginning Paddle One
above).
any Cedar. This paddle was meant to be my whitewater paddle
so I wanted it to be all hardwood. It is made of the best pieces of
Maple from the headboard (which I set aside before beginning Paddle One
above).
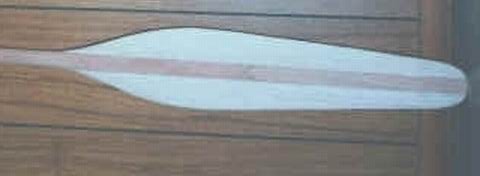
 This photo is an "exploded" view of the
paddle before final glueing. The wide strips on the end of the blade
were the kitchen cutting board:
This photo is an "exploded" view of the
paddle before final glueing. The wide strips on the end of the blade
were the kitchen cutting board:
![]() This
is Paddle Two before it was
sheathed in fibreglass and varnished:
This
is Paddle Two before it was
sheathed in fibreglass and varnished:
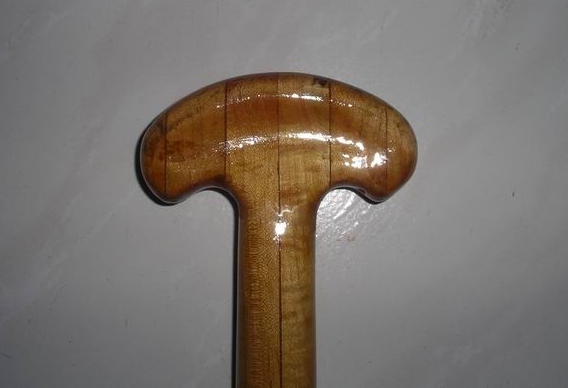 This
is the grip after after glassing and varnishing (this photo was actually taken
after a couple of seasons use).
This
is the grip after after glassing and varnishing (this photo was actually taken
after a couple of seasons use).
![]() I found that the square blade shape
interfered with the hull of the canoe. So I modified the paddle by cutting
it into a teardrop shape. The blade can now be positioned much
closer to the hull for more efficient and unencumbered paddling.
I found that the square blade shape
interfered with the hull of the canoe. So I modified the paddle by cutting
it into a teardrop shape. The blade can now be positioned much
closer to the hull for more efficient and unencumbered paddling.
 My old Cherry paddle had some serious cracks in the
bottom of the blade (sorry, no pics). It was a three-part laminated
paddle so I just cut the sides of the blade off along the old lamination
line. I epoxied two new pieces of Cherry to the shaft piece.
My old Cherry paddle had some serious cracks in the
bottom of the blade (sorry, no pics). It was a three-part laminated
paddle so I just cut the sides of the blade off along the old lamination
line. I epoxied two new pieces of Cherry to the shaft piece.
Then I started to think about what shape I would like
for the  blade. This paddle would be for
deep flatwater paddling. After drawing and erasing several different blade
shapes, it came down to two finalists. The one on the right of these
two merged photos was an
attempt at a "beaver tail" shape. I chose the one on the left -
a modified version of old voyageur paddles with the narrow end. Here it is
after cutting, shaping, and sanding:
blade. This paddle would be for
deep flatwater paddling. After drawing and erasing several different blade
shapes, it came down to two finalists. The one on the right of these
two merged photos was an
attempt at a "beaver tail" shape. I chose the one on the left -
a modified version of old voyageur paddles with the narrow end. Here it is
after cutting, shaping, and sanding:
As you can see, the Cherry I bought was not as dark as the shaft of my old paddle. The blade of the Cherry paddle is very thin and the bottom 6 inches of the tip is reinforced with fibreglass, the entire blade is varnished, and the shaft is oiled for a smooth feel.

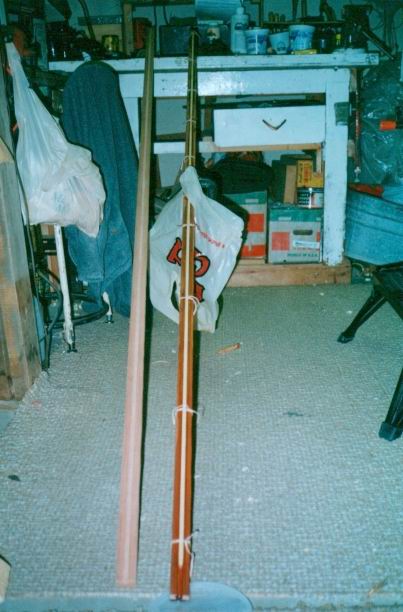 I am not a
kayaker but I decided to build a double bladed paddle for fun and perhaps
to take on windy trips. It is made of red cedar with an ash core. The
blades are offset by almost 45 degrees.
I am not a
kayaker but I decided to build a double bladed paddle for fun and perhaps
to take on windy trips. It is made of red cedar with an ash core. The
blades are offset by almost 45 degrees.
![]()
![]()
![]()